Basic BPMN elements overview
Modelling your processes at BPMN 2.0 standard can be quite confusing at the beginning. That´s why we have collected all BPMN elements you can use in Flower.
There are also some more complex cases which we added as seperate subpages to this site. Take a look!
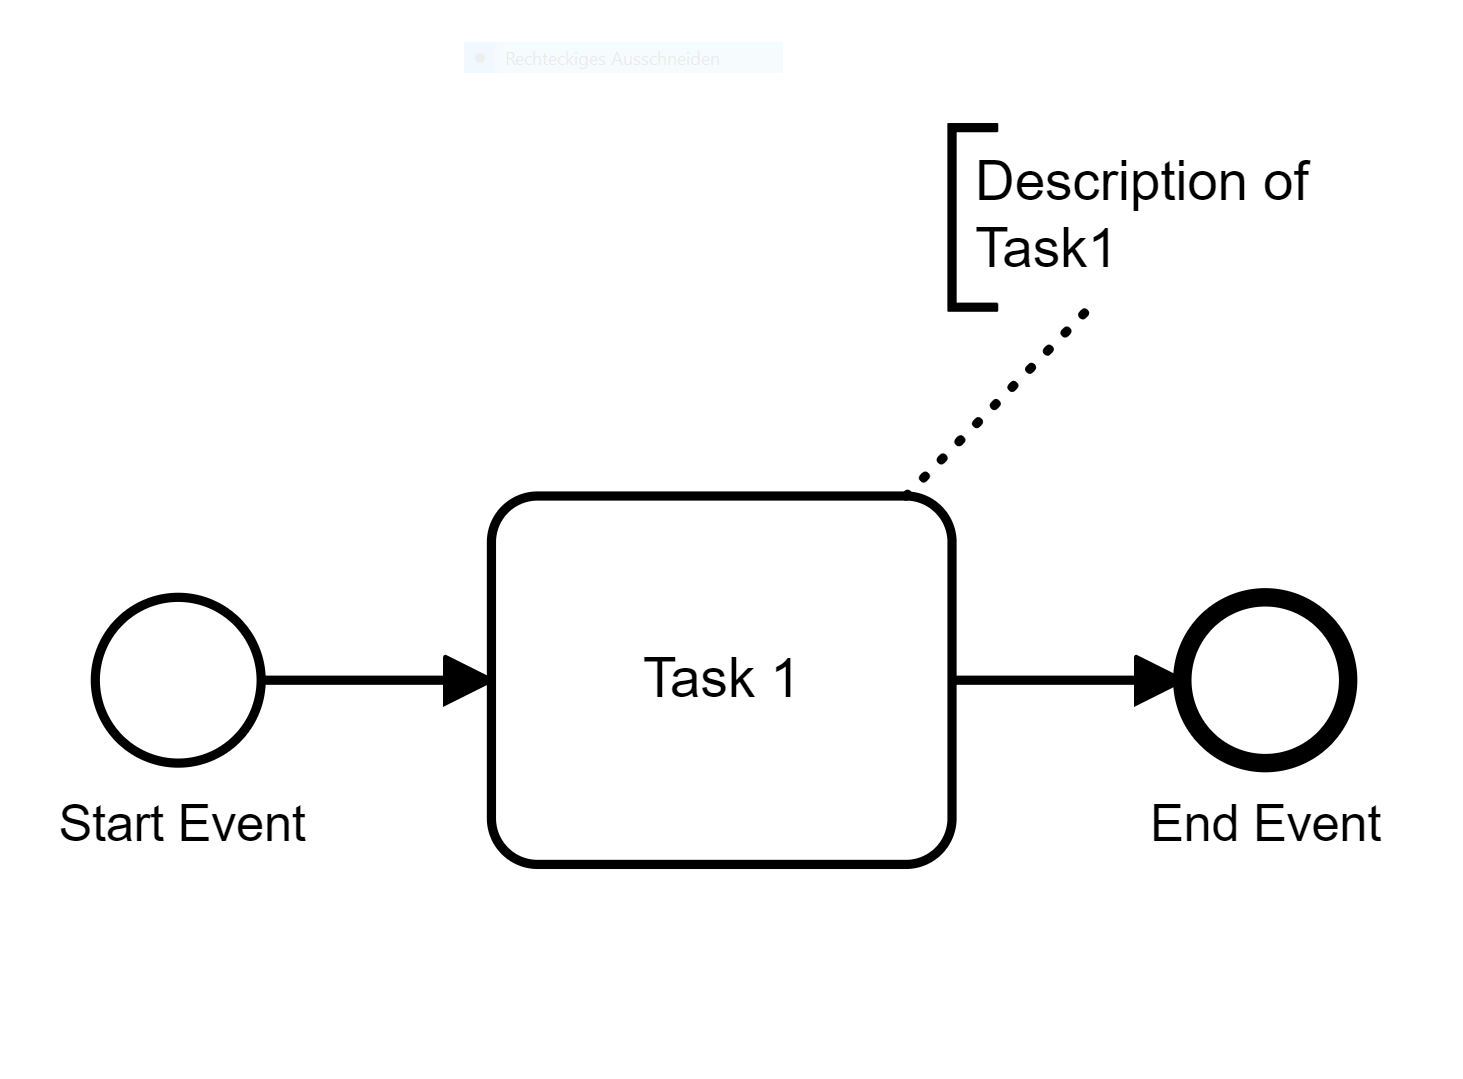
1.Tasks
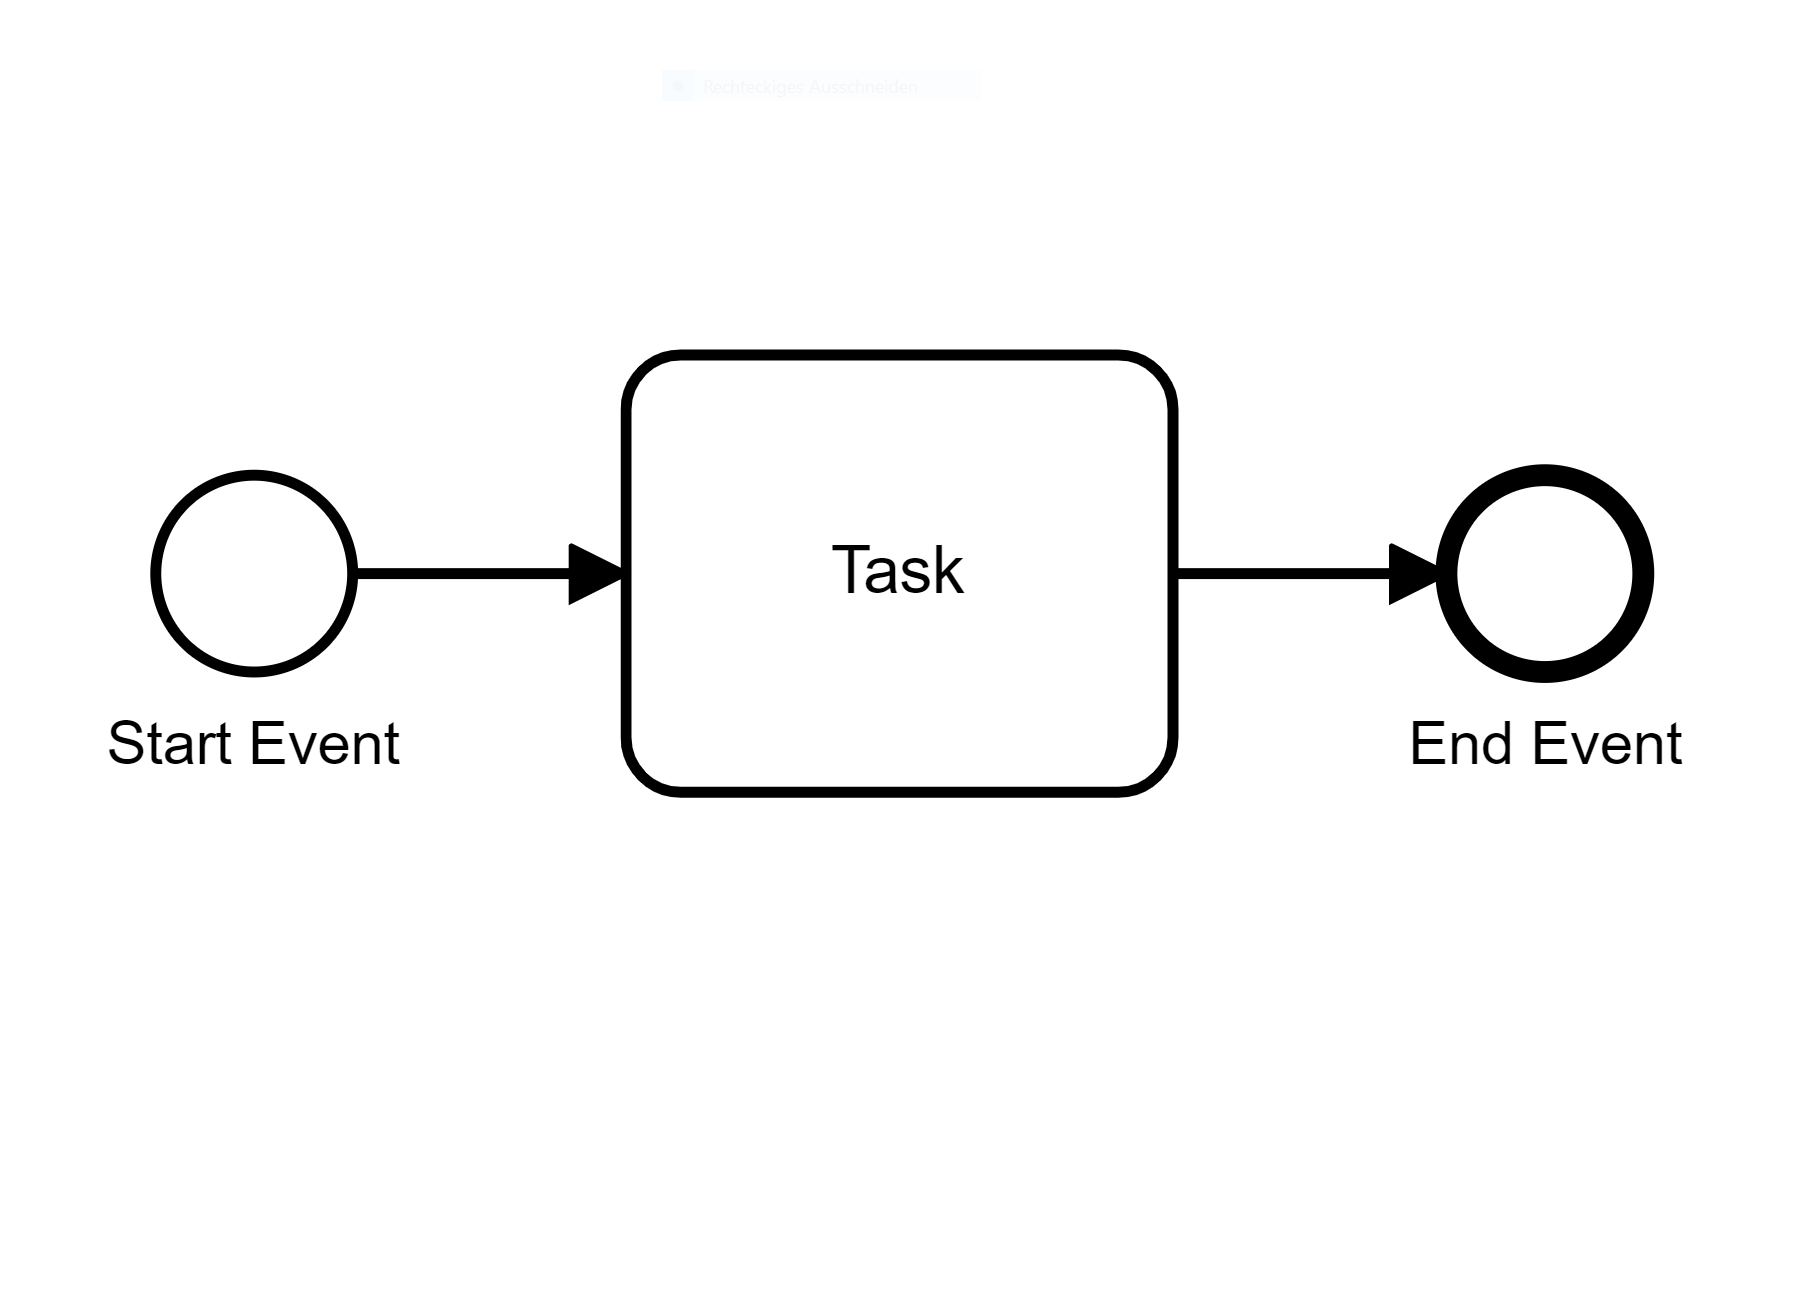
a. Create Start Event (and name it)
b. Create Task (and name it)
c. Create End Event (and name it)
Rules for Task-Names:
- Strong verb + domain specific noun – emphasizes achieving a discrete goal after performing work.
- No conjunctions in names – raise name abstraction level or split into two subsequent/alternative activities.
- Short name + documentation – the name should emphasize the goal, and details of activity can be captured in comments or documentation.
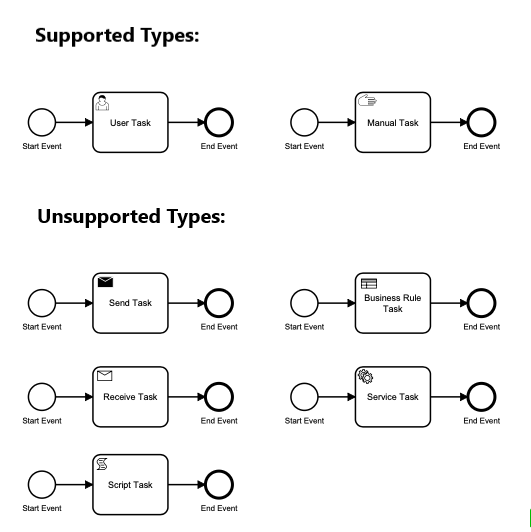
Basic Task Types:
Unsupported means that these Basic Task Types are only used for modeling porpuses, but do not have any effect on the automation.
a. "Send Task": A Send Task is represents a task that sends a Message to another lane. The Task is completed once the Message has been sent.
b. "Receive Task": A Receive Task indicates that the process has to wait for a message to arrive in order to continue. The Task is completed once the message has received.
c. "User Task": A User Task represents that a human performer performs the Task with the use of a software application.
d. "Manual Task": A Manual Task is a Task that is performed without the aid of any business process execution engine or any application.
e. "Business Rule Task": It provides a mechanism for a process to provide input to a Business Rules Engine and then obtain the output provided by the Business Rules Engine.
f. "Service Task": A Service Task is a Task that uses a Web service, an automated application, or other kinds of service in completing the task.
g. "Script Task": A Script Task is executed by a business process engine. The task defines a script that the engine can interpret. When the task begin, the engine will execute the script. The Task will be completed when the script is completed.
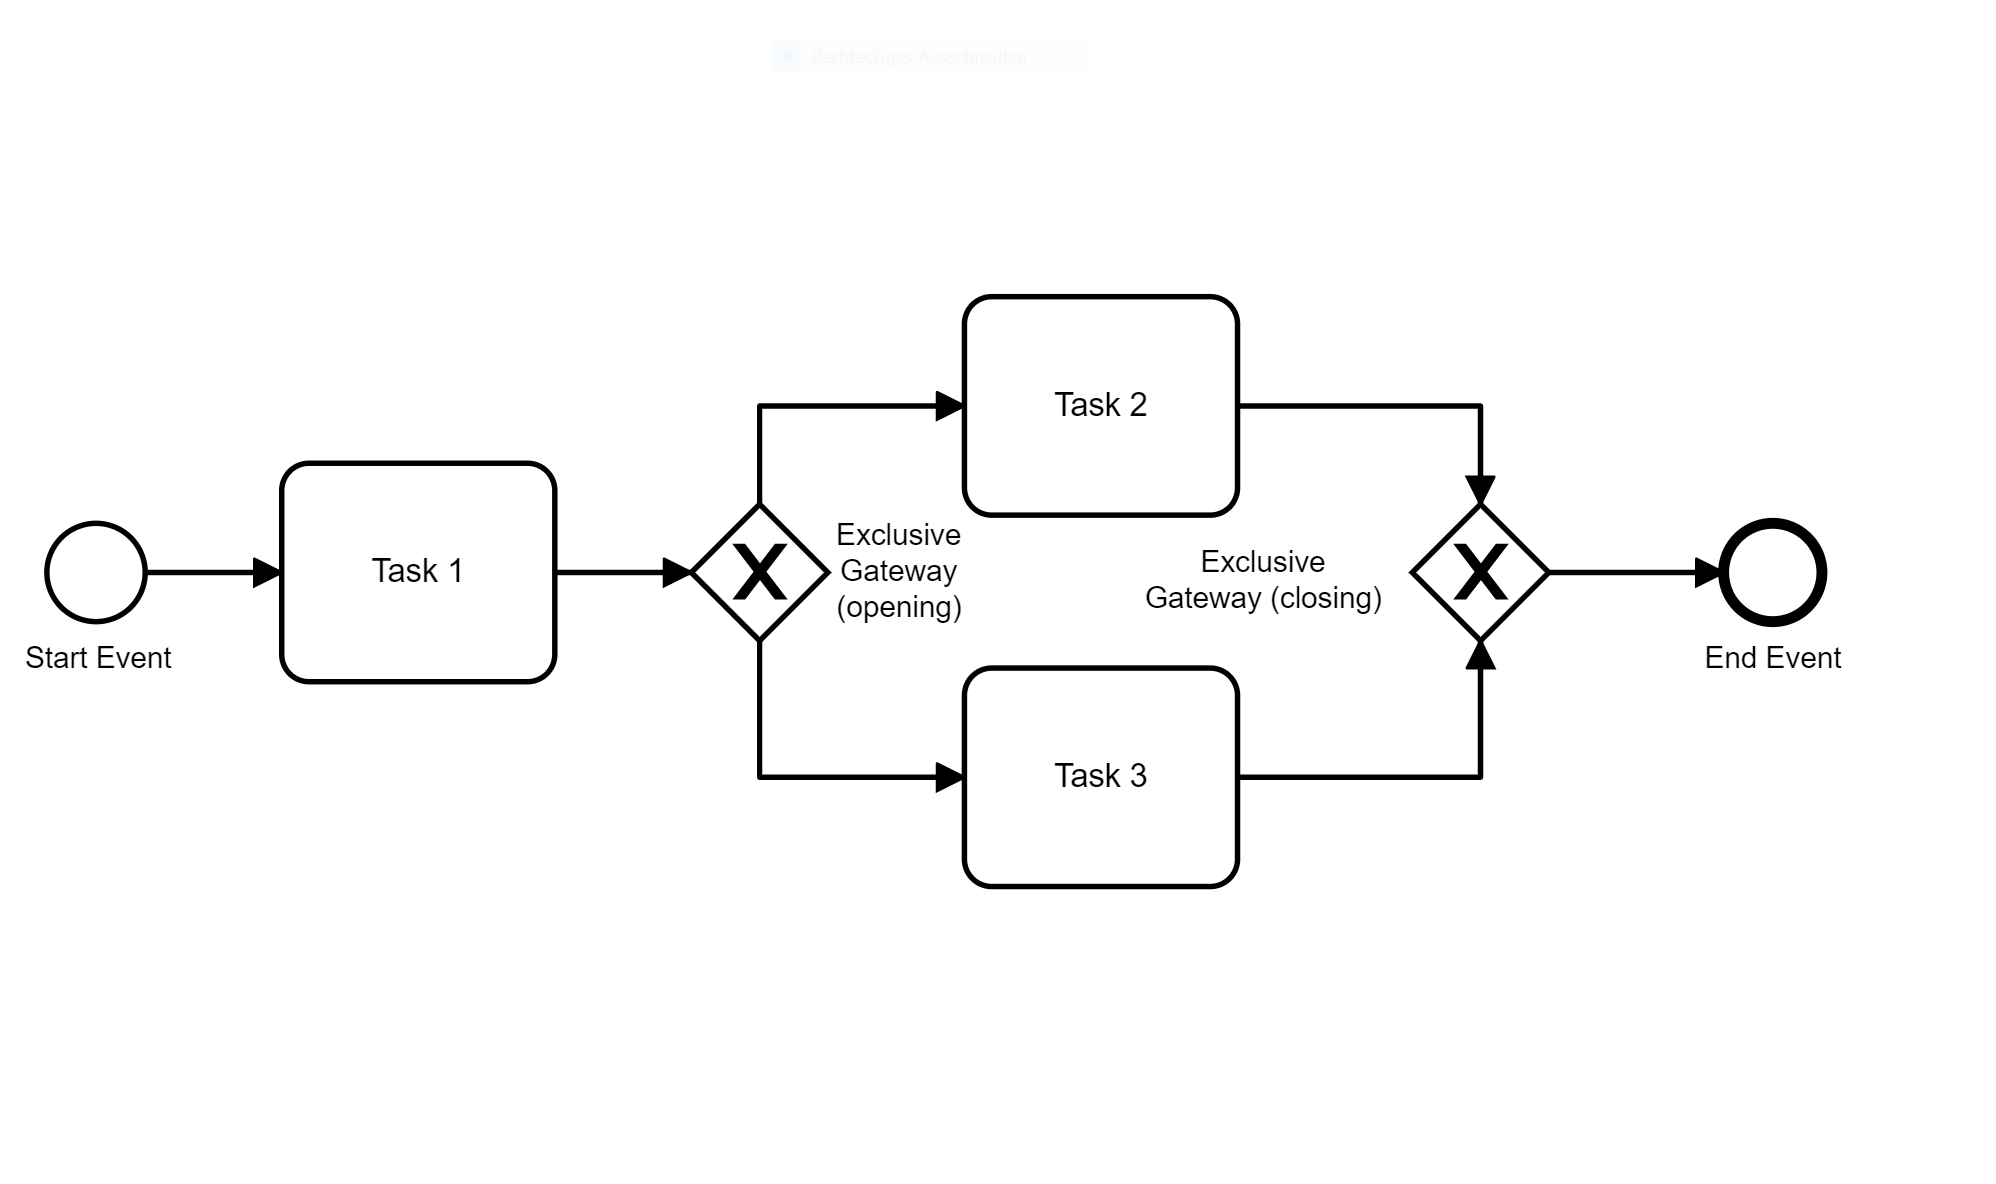
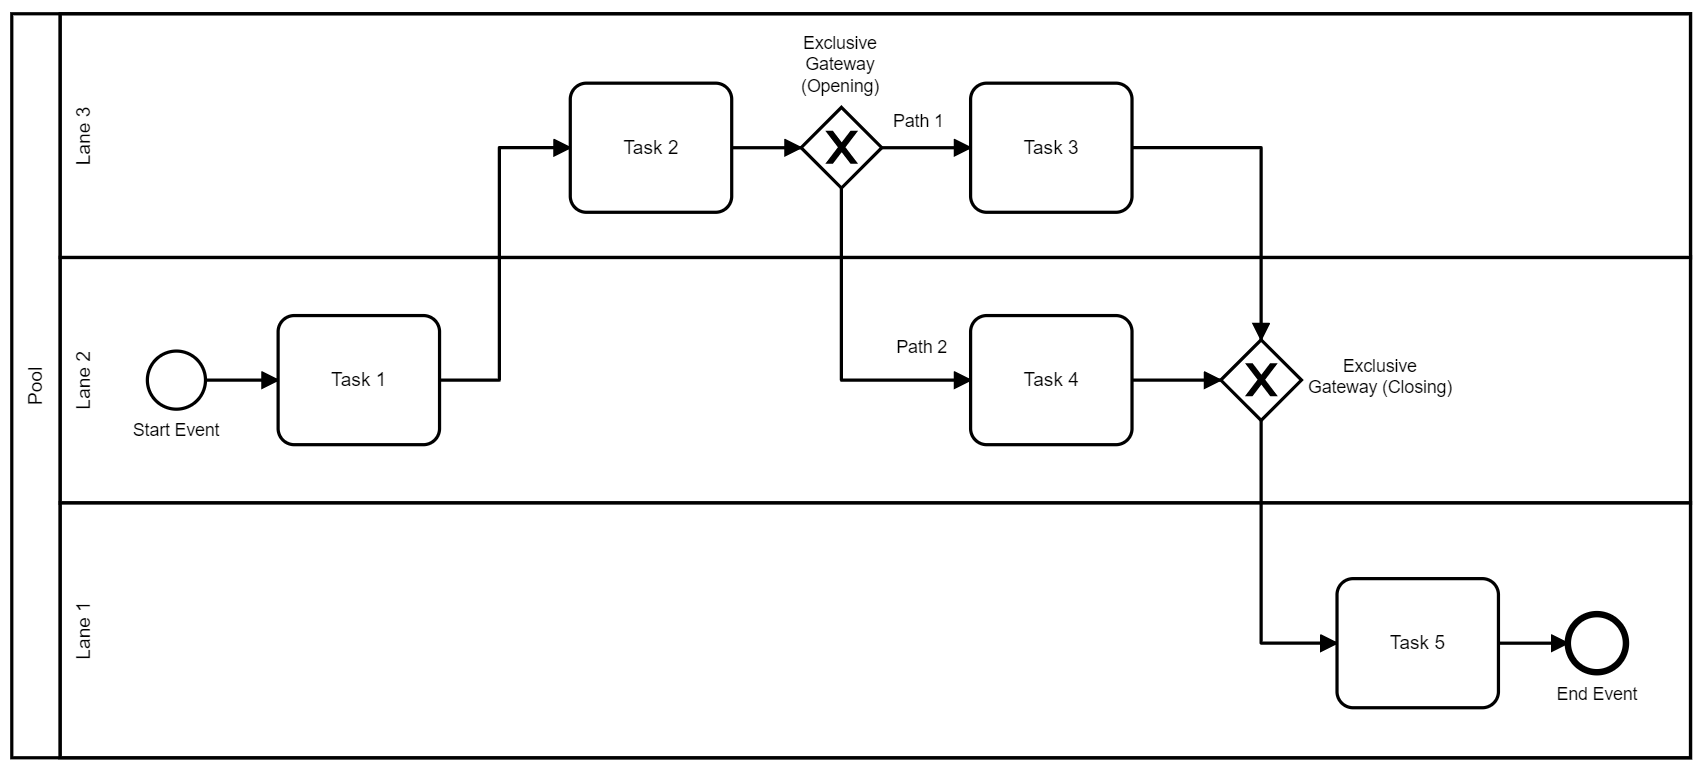
2. Add an exclusive Gateway
a. Create Opening Exclusive Gateway (and name it)
b. Name possible paths
c. Create Closing Exclusive Gateway (Gateways need to be closed)
Only one of the two possible paths can be taken (XOR)
Rules for Gateways:
- the gateway should be labeled with the desicion relevant question (no activity name; a gateway is just a branch and doesn´t do anything by itself)
- the paths should be labeled with the answers
- Always use gateways for branch-ing/merging – improves readability of the diagram and explicitly indicates control points.
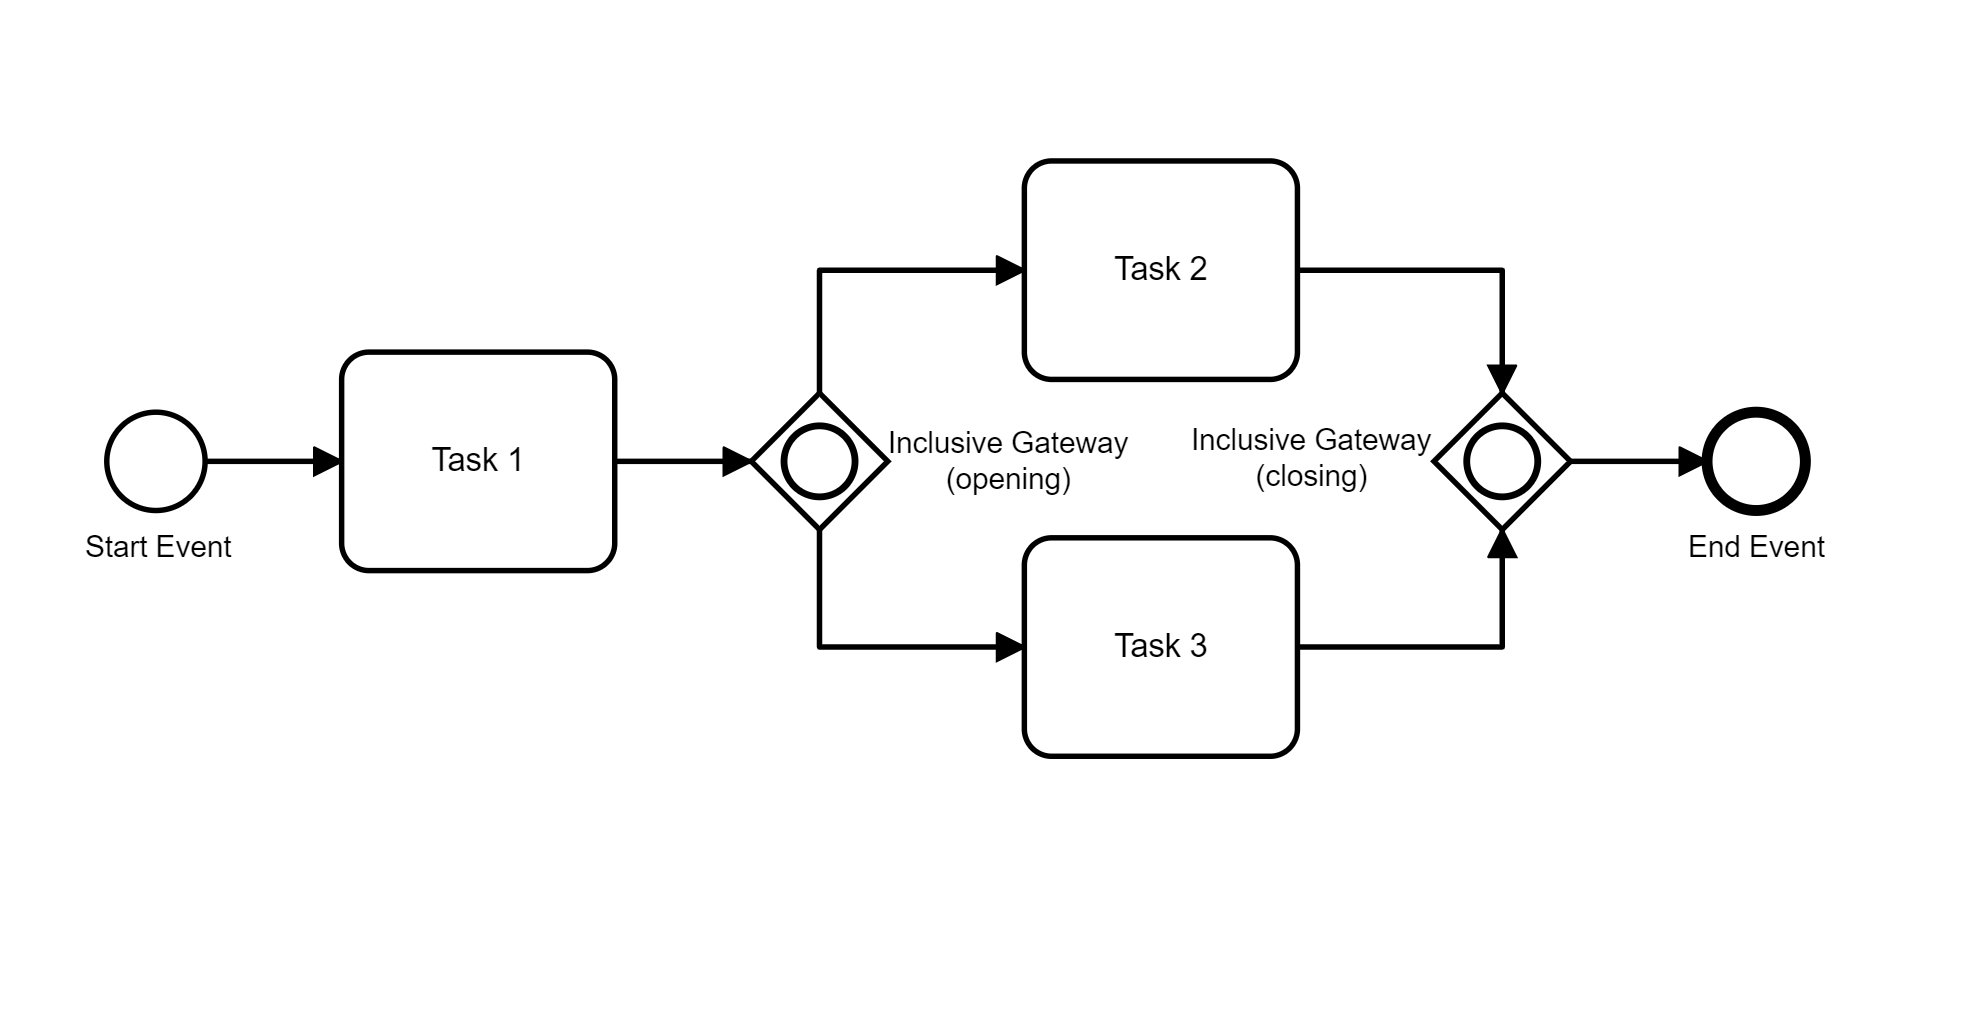
3. Add an inclusive Gateway
One or both of the possible paths can be taken (OR)
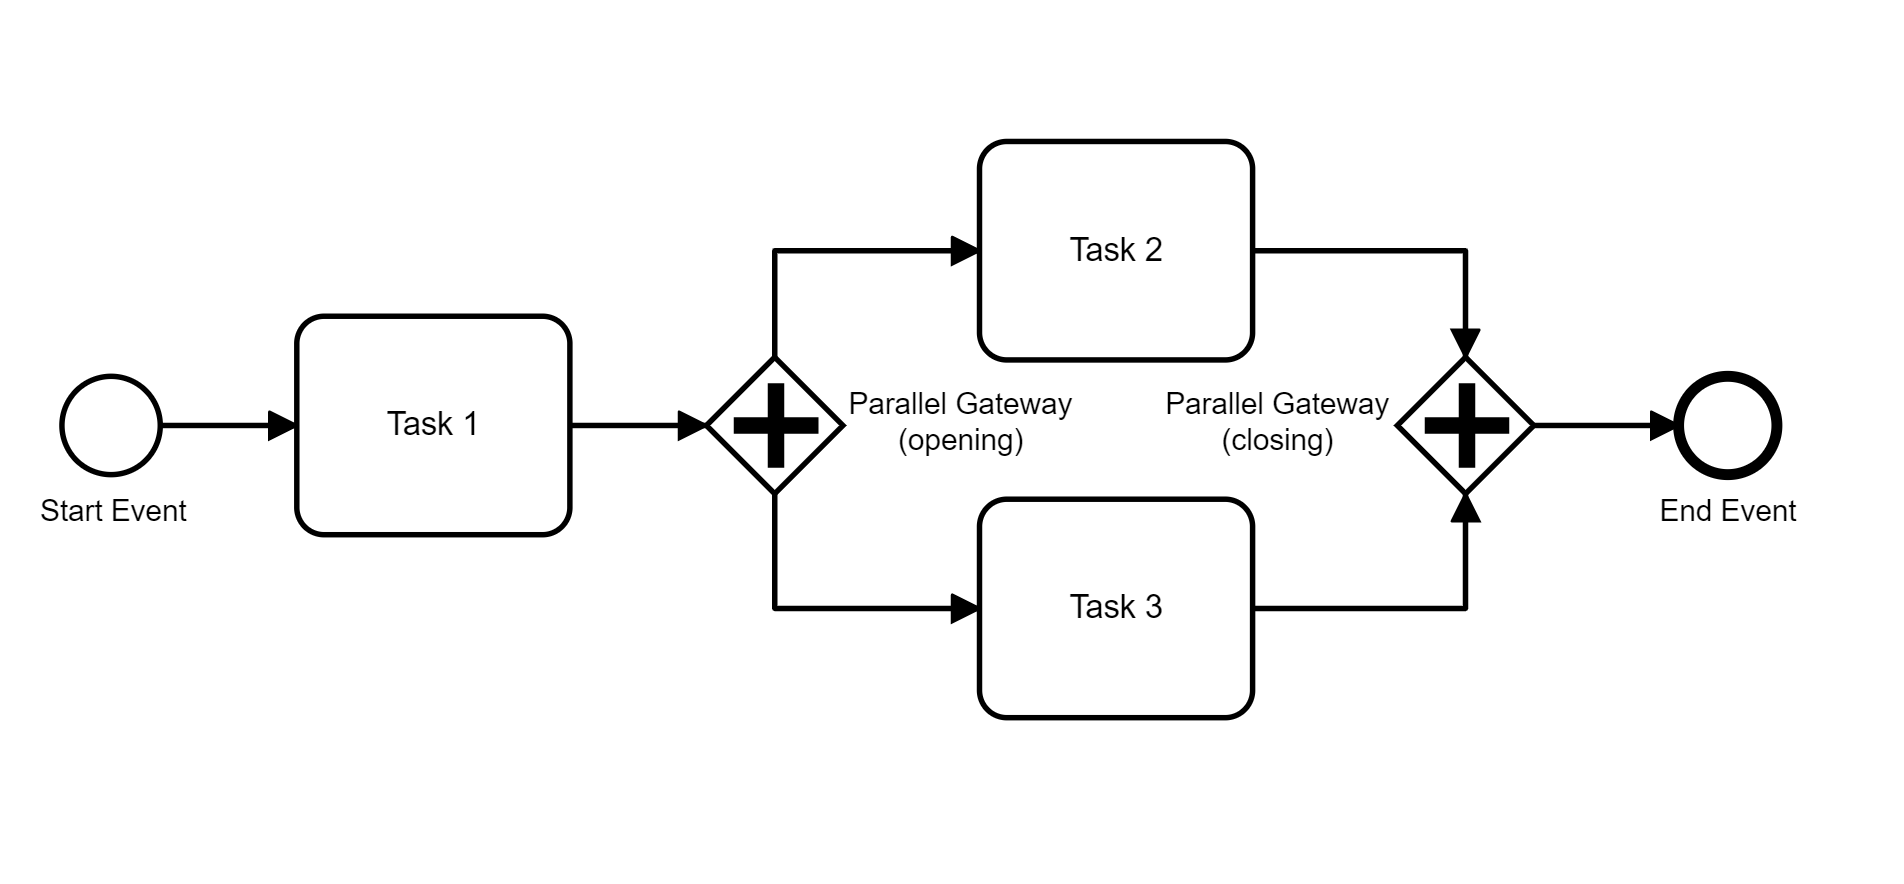
4. Add a parallel Gateway
Both paths have to be taken parallely (AND)
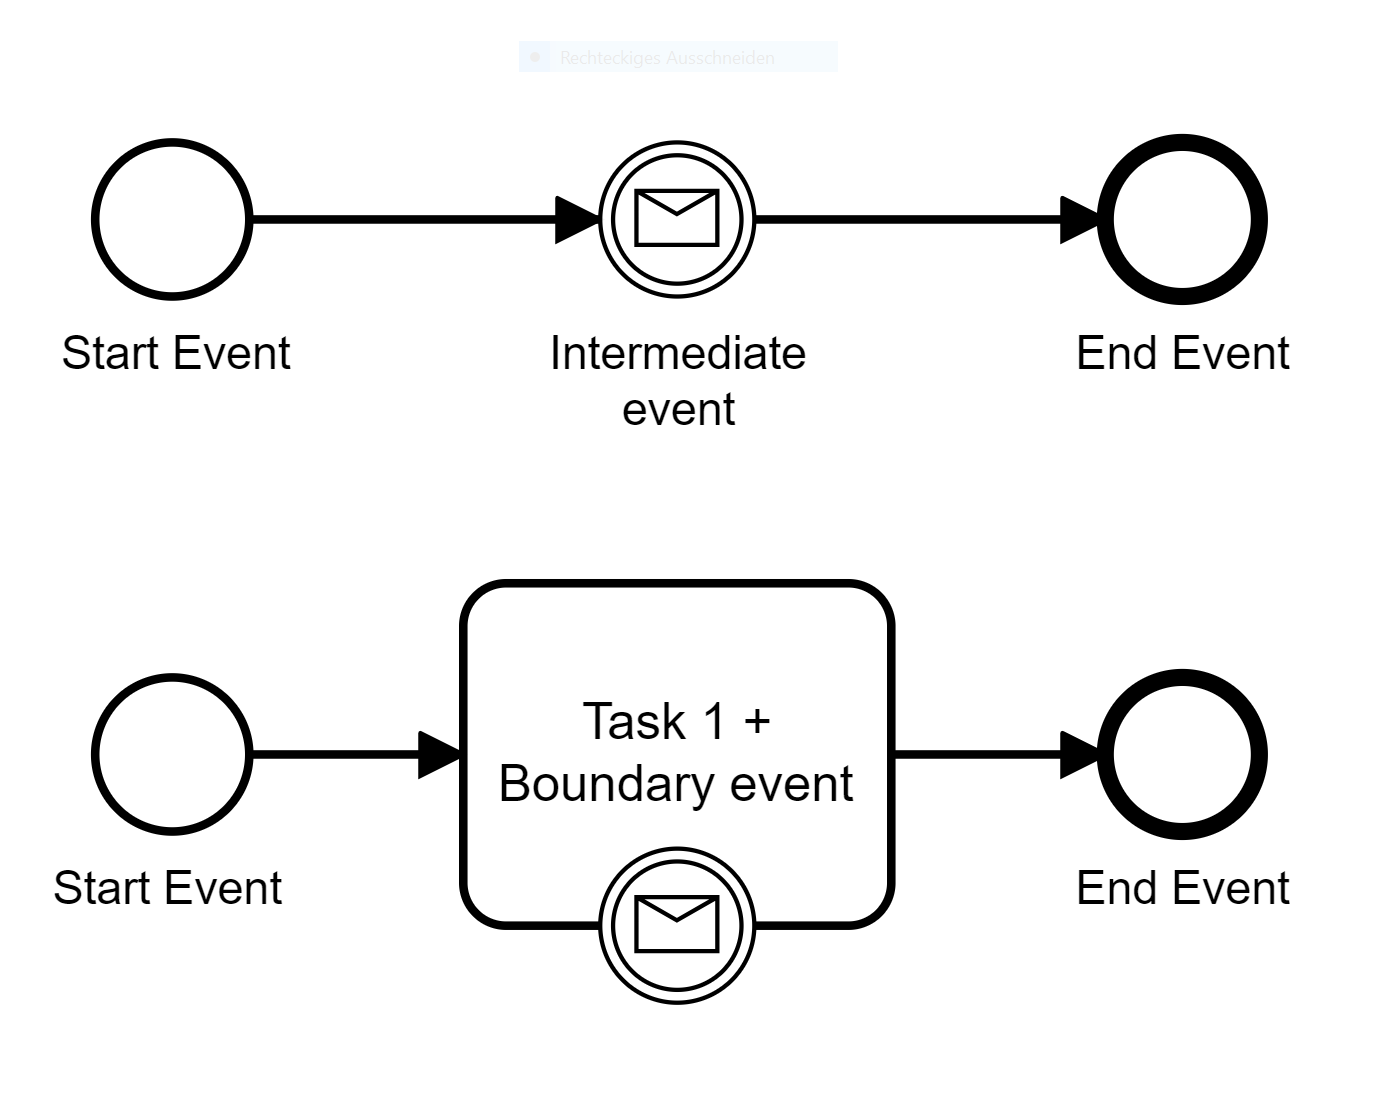
5. Add Intermediate/Boundary Events
Adding Intermediate Events:
Create Intermediate Event (Change type via "Change Type"-Button)
Adding Boundary Events:
a. Create a Task (and name it)
b. Drag and drop an Intermediate Event onto the created Task to create a Boundary Event
(Change type via "Change Type"-Button)
c. Configurate the Boundary Event by adding a Resolution ( for step-by-step instructions see Flower Configuration Manual)
Basic Intermediate Event Types:
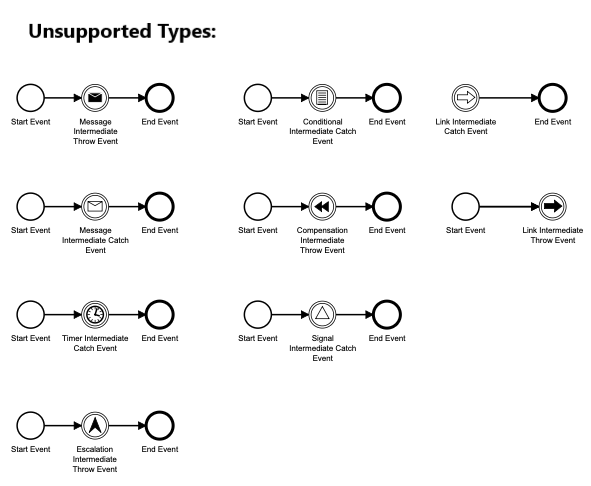
Unsupported means that these Basic Intermediate Event Types are only used for modeling porpuses, but do not have any effect on the automation.
a. "Message Intermediate Throw Event": Used to send outgoing messages.
b. "Message Intermediate Catch Event": Used to respond to incoming messages.
c. "Timer Intermediate Catch Event": Causes a delay in a process, or initiates behavior at a set time or set delay.
d. "Escalation Intermediate Throw Event":
e. "Conditional Intermediate Catch Event":
f. "Compensation Intermediate Throw Event": Used to initiate or handle compensation within a process.
g. "Signal Intermediate Catch Event":
h. "Link Intermediate Event": Connects another link event to allow for “jumping” from one process to another
Basic Boundary Event Types:
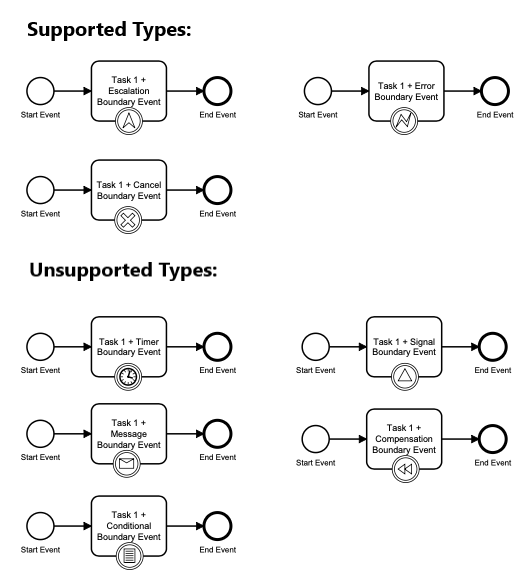
Unsupported means that these Basic Boundary Event Types are only used for modeling porpuses, but do not have any effect on the automation.
a. "Message Boundary Event": A boundary message event listens to a message being received while the activity upon which the event is defined is active.
b. "Timer Boundary Event": A boundary timer event puts a timer on the activity it is defined on. When the timer fires, the sequence flow going out the boundary event is followed.
c. "Escalation Boundary Event":
d. "Conditional Boundary Event":
e. "Error Boundary Event": A boundary error event catches an error that is thrown within the boundaries of the activity the event is based on and continues process execution from the event.
f. "Cancel Boundary Event": Cancel Intermediate Event. Used to cancel a transaction sub-process when a cancel end event is reached.
g. "Signal Boundary Event": A boundary signal event listens to a signal being fired (from within the process instance or system-wide) while the activity upon which the event is defined is active.
h. "Compensation Boundary Event":
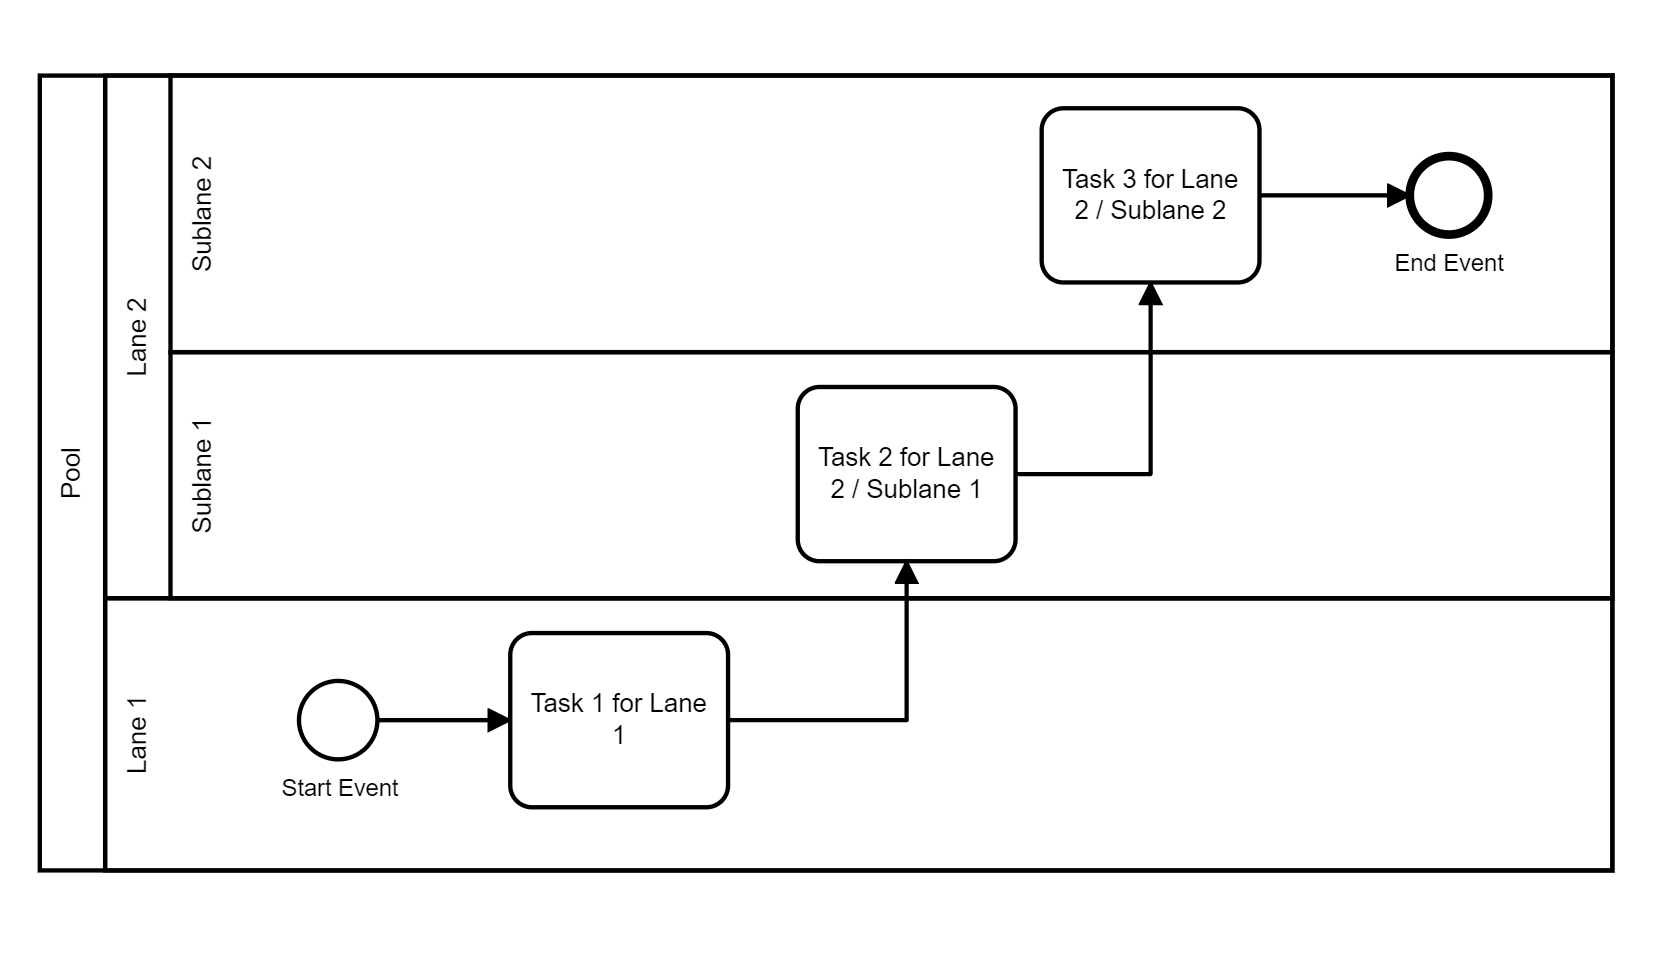
6. Create Pool & Lanes
There are two types of swimlanes:
- Pools represent participants in one collaboration
- Lanes represent subdivisions of a process (can be divided in Sublanes)
Rules:
- Lanes have to be integrated in a pool
- Pools define the limits of a process
- Objects like tasks, gateways and events have to be assigned to one lane exactly
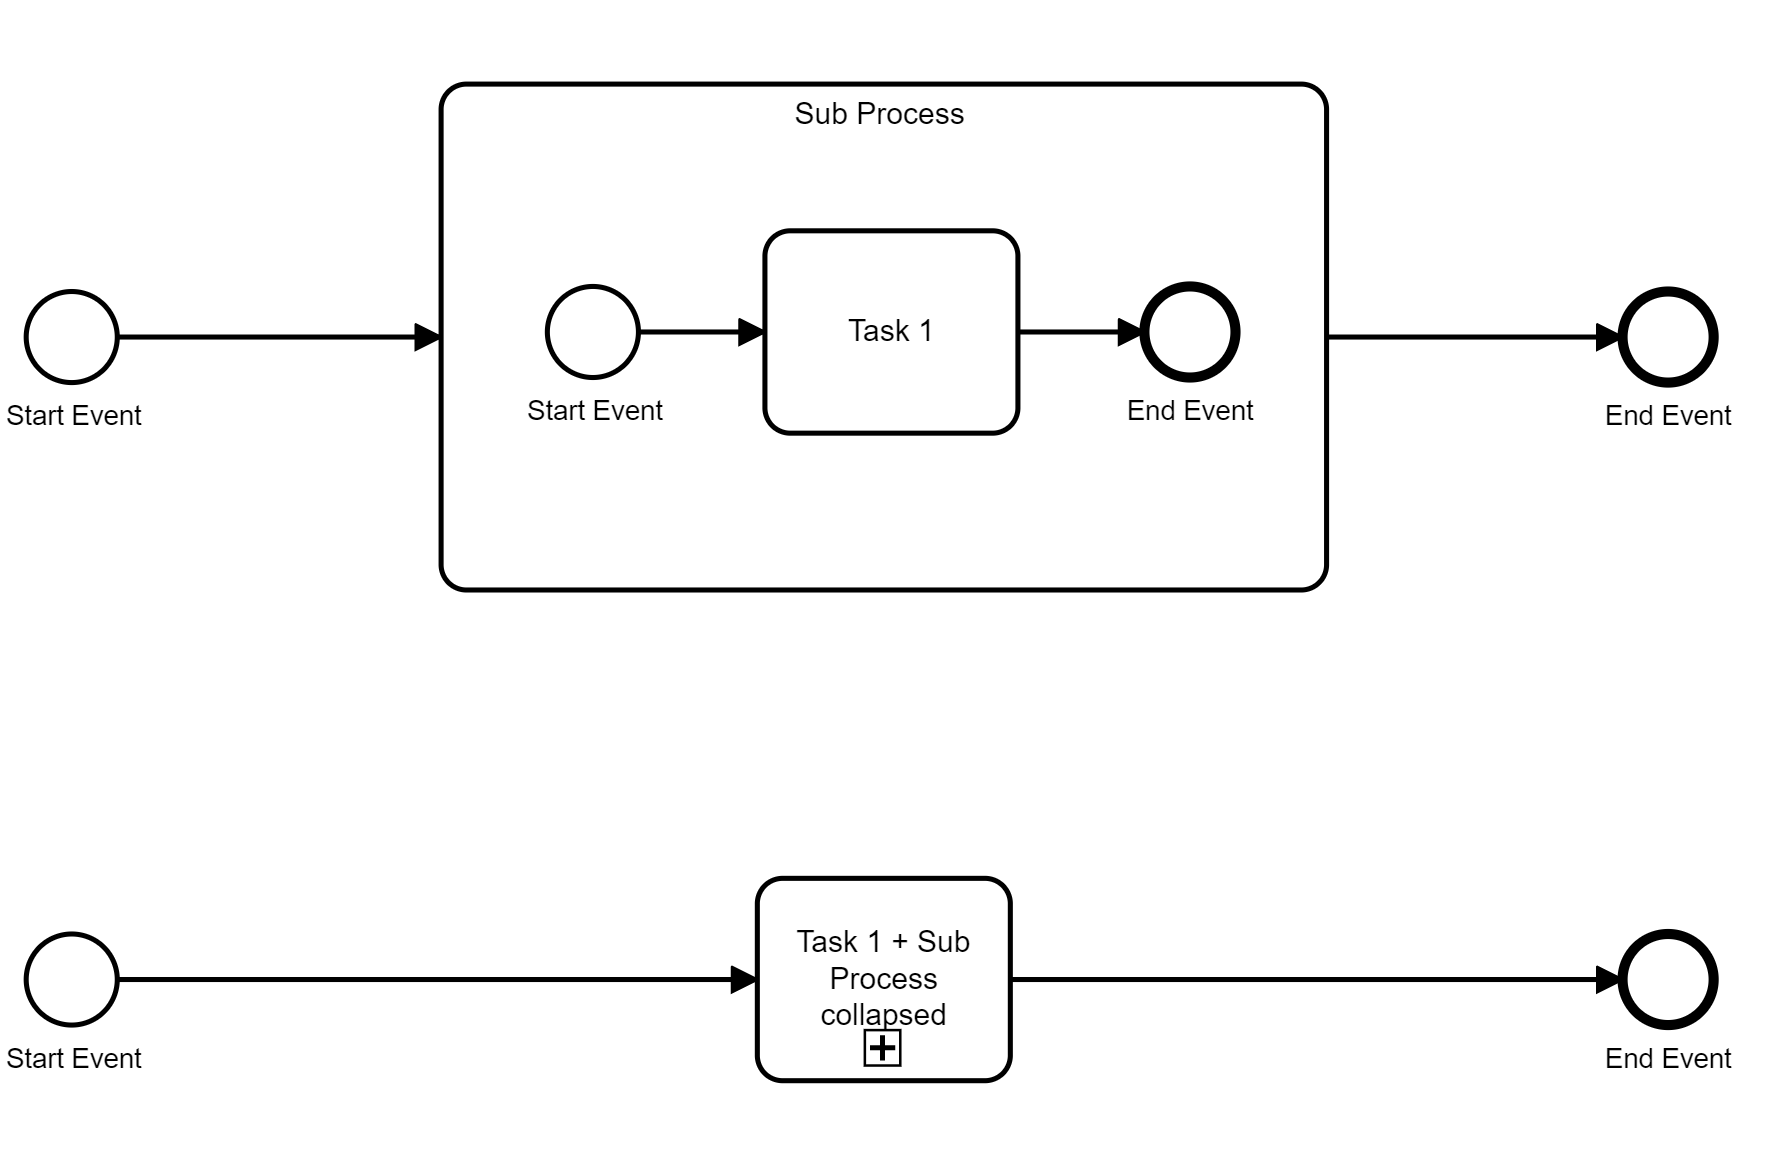
7. Create Sub-Process
Create an expanded Sub Process:
a. Create a Task (and name it)
b. Change the Task Type via the "Change Type"-Button and select "Sub Process expanded" to create the Sub Process (and name it)
(Alternatively you can create an expanded Sub Process via the Toolbar)
c. Drag and drop components into the Sub Process field
d. Integrate the Sub Process into your diagram
Create a collapsed Sub Process:
a. Create a Task (and name it)
b. Change the Task Type via the "Change Type"-Button and select "Sub Process collapsed"
c. Navigate to the Toggling Section and select the Tab "Flower"
d. Select a Sub Process to integrate in your model
8. Append Text Annotation
Text Annotations can be appended in order to describe the task in a more detailled way.
- several Text Annotations can be appended to one task
- will be added to the description area in the automation process
- instructions will be also added to the description are in the automation process
9. Keep an eye on your diagram layout
Avoid:
- "everything in one page" style, which impairs overview and makes it difficult to understand and analyze the process (a practical number of visual elements to focus on is 7∓4)
- slalom (try to represent the temporal structure of the process)
- different symbol sizes
- uneven spacing
- blended lines
